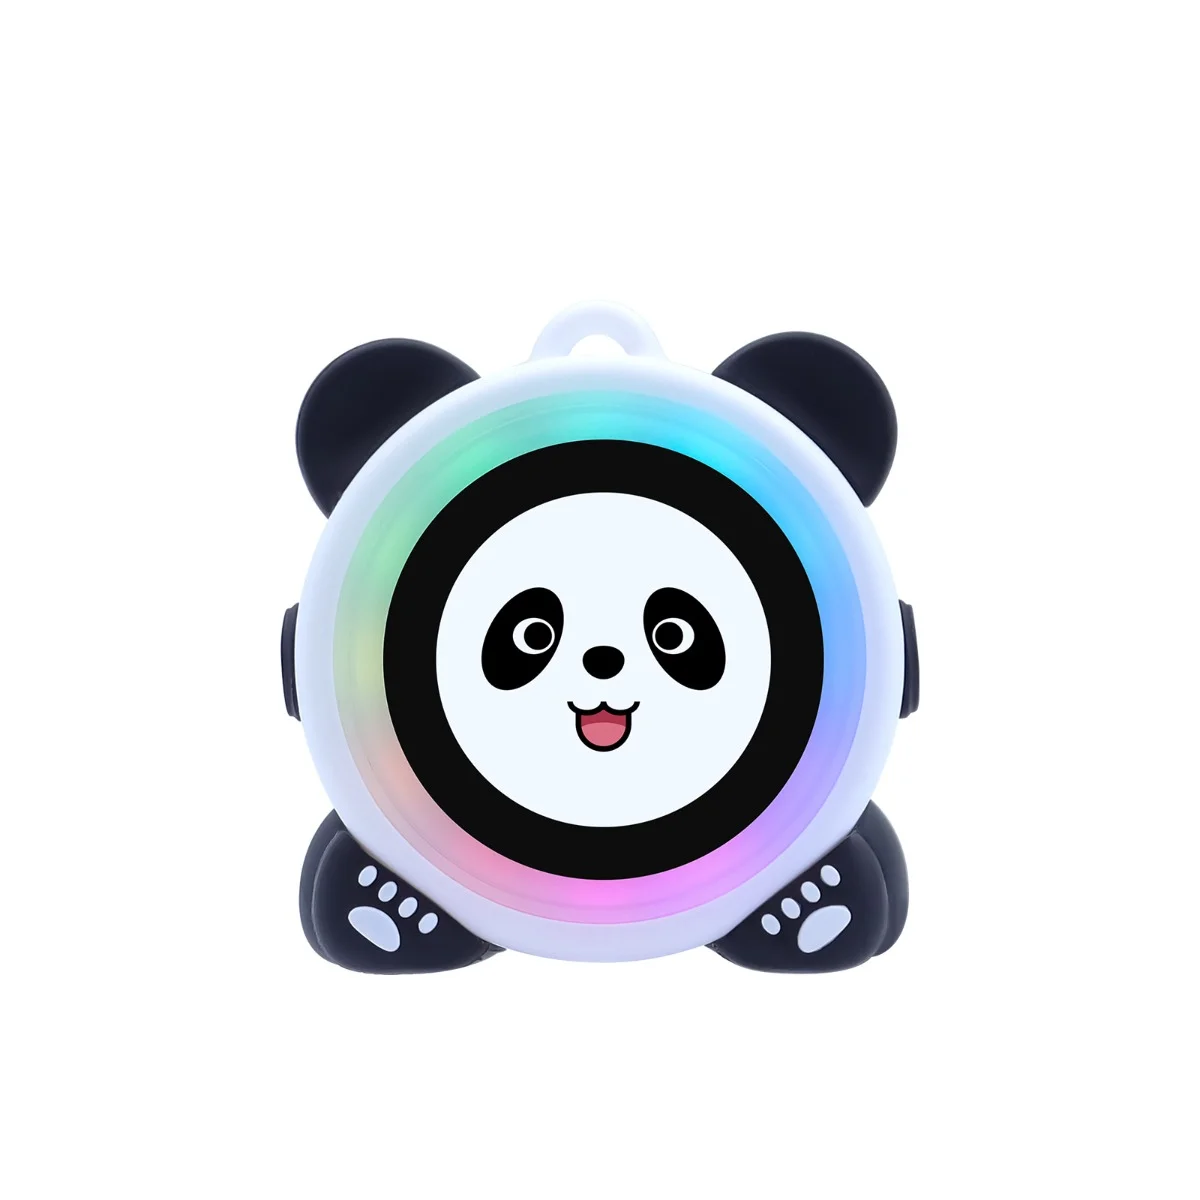
AI Panda Chatbot with Intelligent Voice Control | Emotional Companion | Voice Assistant
Model AIB00101D
Specification
| Main Processor | ESP32-S3N16R8 |
|---|---|
| System memory | 8MB Octal SPI PSRAM |
| Storage | 16MB Quad SPI Flash |
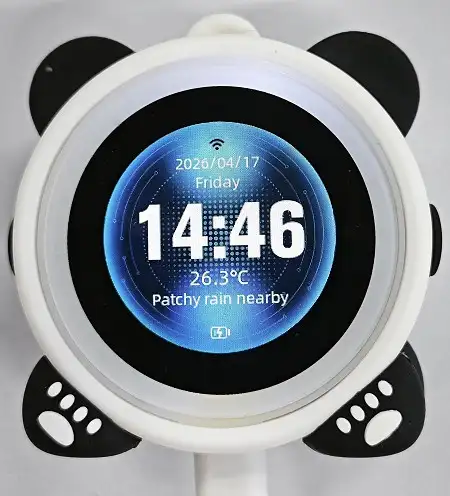
| Display Size | 1.28inch (R) |
| Display Panel | Non-touch,Round shape, IPS Panel |
| Resolution | 240×240 |
| Bluetooth | Supports multiple speeds (125 Kbps~2 Mbps) and broadcast extension, improving device connection stability and coverage (this product does not use Bluetooth). |
| WIFI | Wi-Fi 4 (802.11 b/g/n): Supports the 2.4 GHz band, with a maximum speed of 150 Mbps, suitable for high-bandwidth IoT applications. |
| Button | 1x AI Button for switching voice recognition;1x Switch button; |
| LED indicator light | Full-color ambient lighting effects (voice control) |
| Size | 62*60*32(mm) |
| Shell material | 3D printed + silicone sleeve (with panda ears) |
| Net Weight | 87g |
| Protection rating | 1.5-meter drop protection rating (with silicone case) |
| Operating temperature | -15°C to 50°C |
| Storage temperature | -15°C to 50°C |
| Power input | 5V input charging |
| Charging port | Type-C Interface |
AI Panda ChatBot Operating Instructions
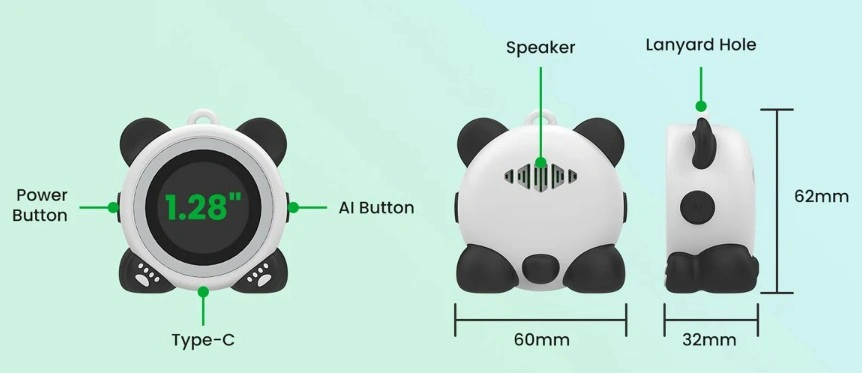
Power Button:
Click to turn the screen on or off; long press for 3S to power on or off.
AI Button
When the device is powering on, click to enter network pairing mode;
During device use, click to wake or exit AI function.
Operating Instructions:
1.Long press for 3S to power on and enter network pairing mode.
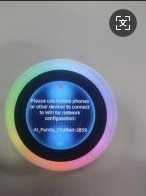
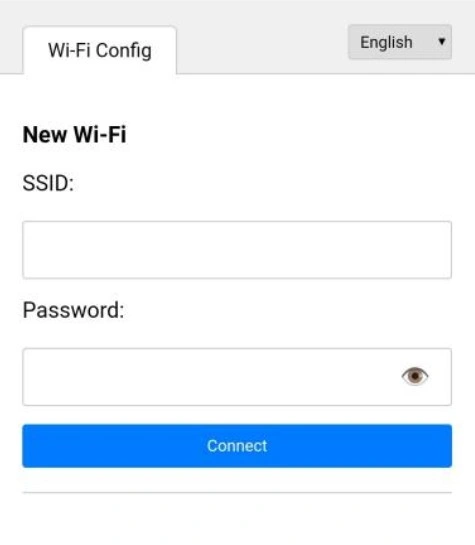
2.Open your phone/computer's WIFI list, click on AI_Panda_Chatbot-XXXX to enter WIFI pairing mode. Choose an available WIFI network, enter the WIFI password, and click “connect”.
- After connecting to the network, enter AI Hub Registration mode.
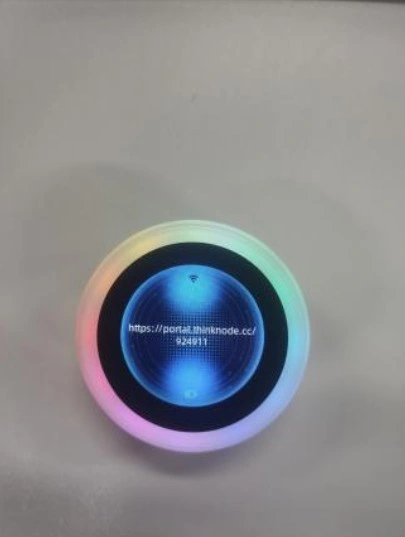
- Open a browser and go to https://xiaozhi.me/.You can switch languages in the top right corner.
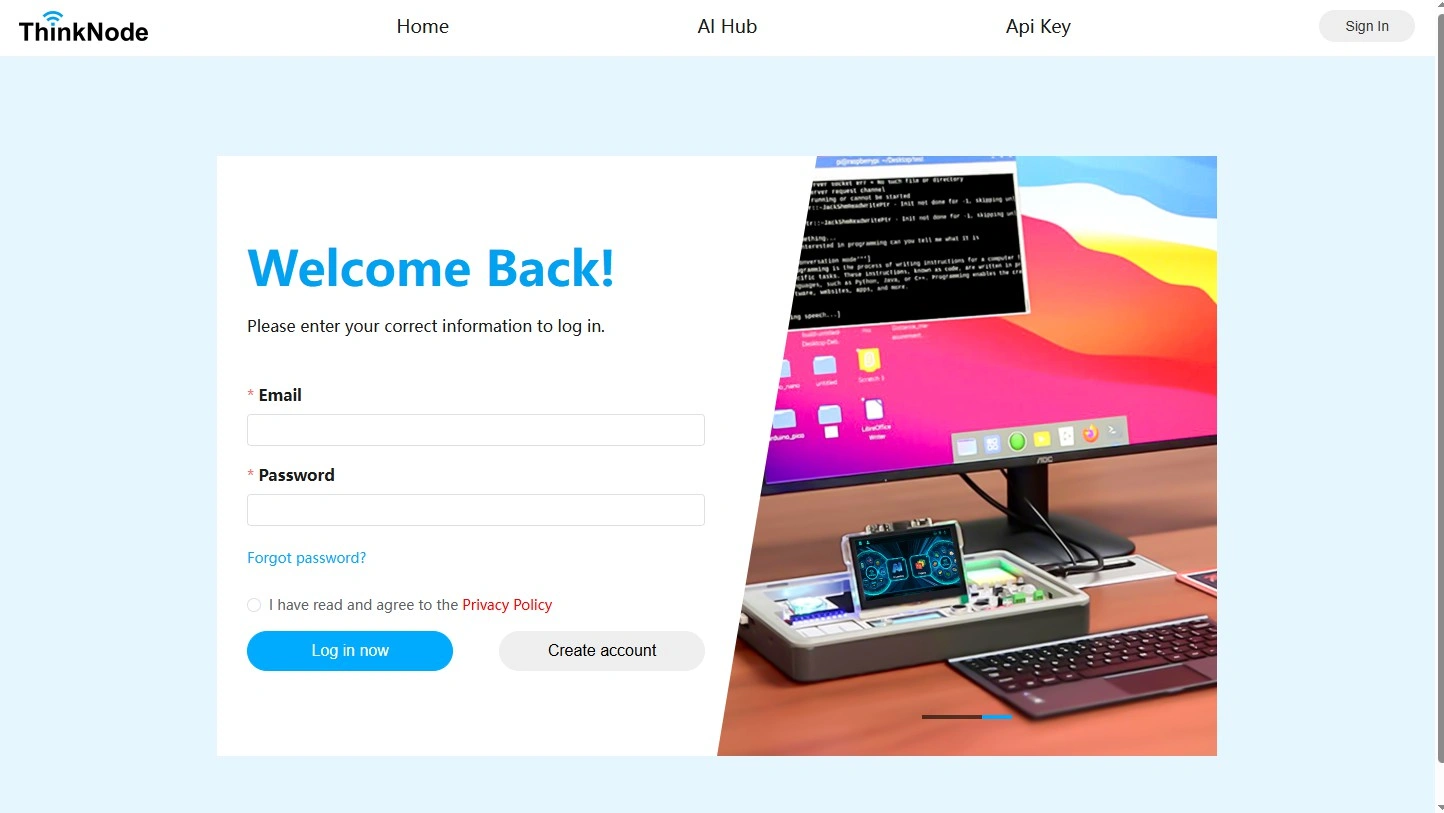
5.Click“Console”,Select the international dialing code for your phone number,enter your phone number,and Login.
6.After completing the login, click “Create Agent”.
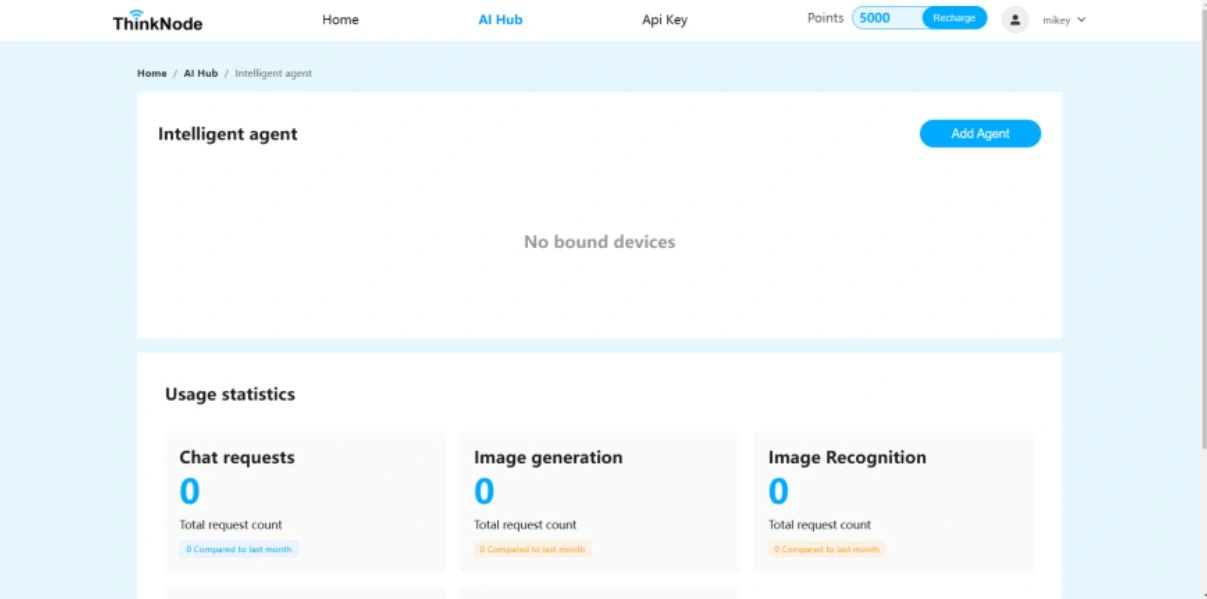
- Set a name for the AI Agent and click “Confirm”.
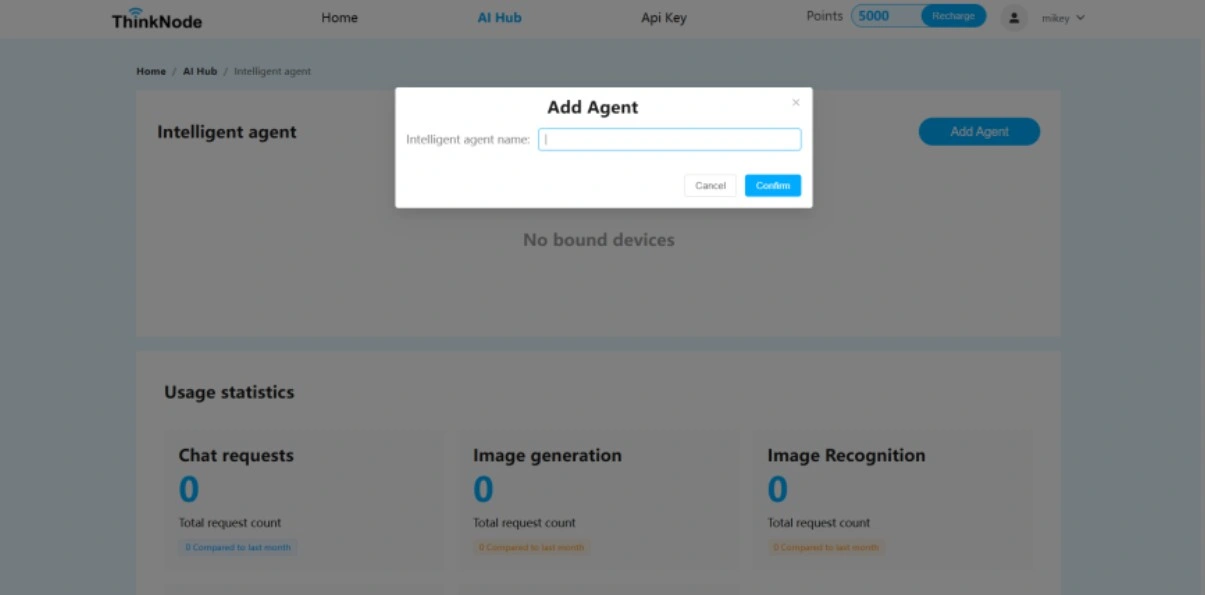
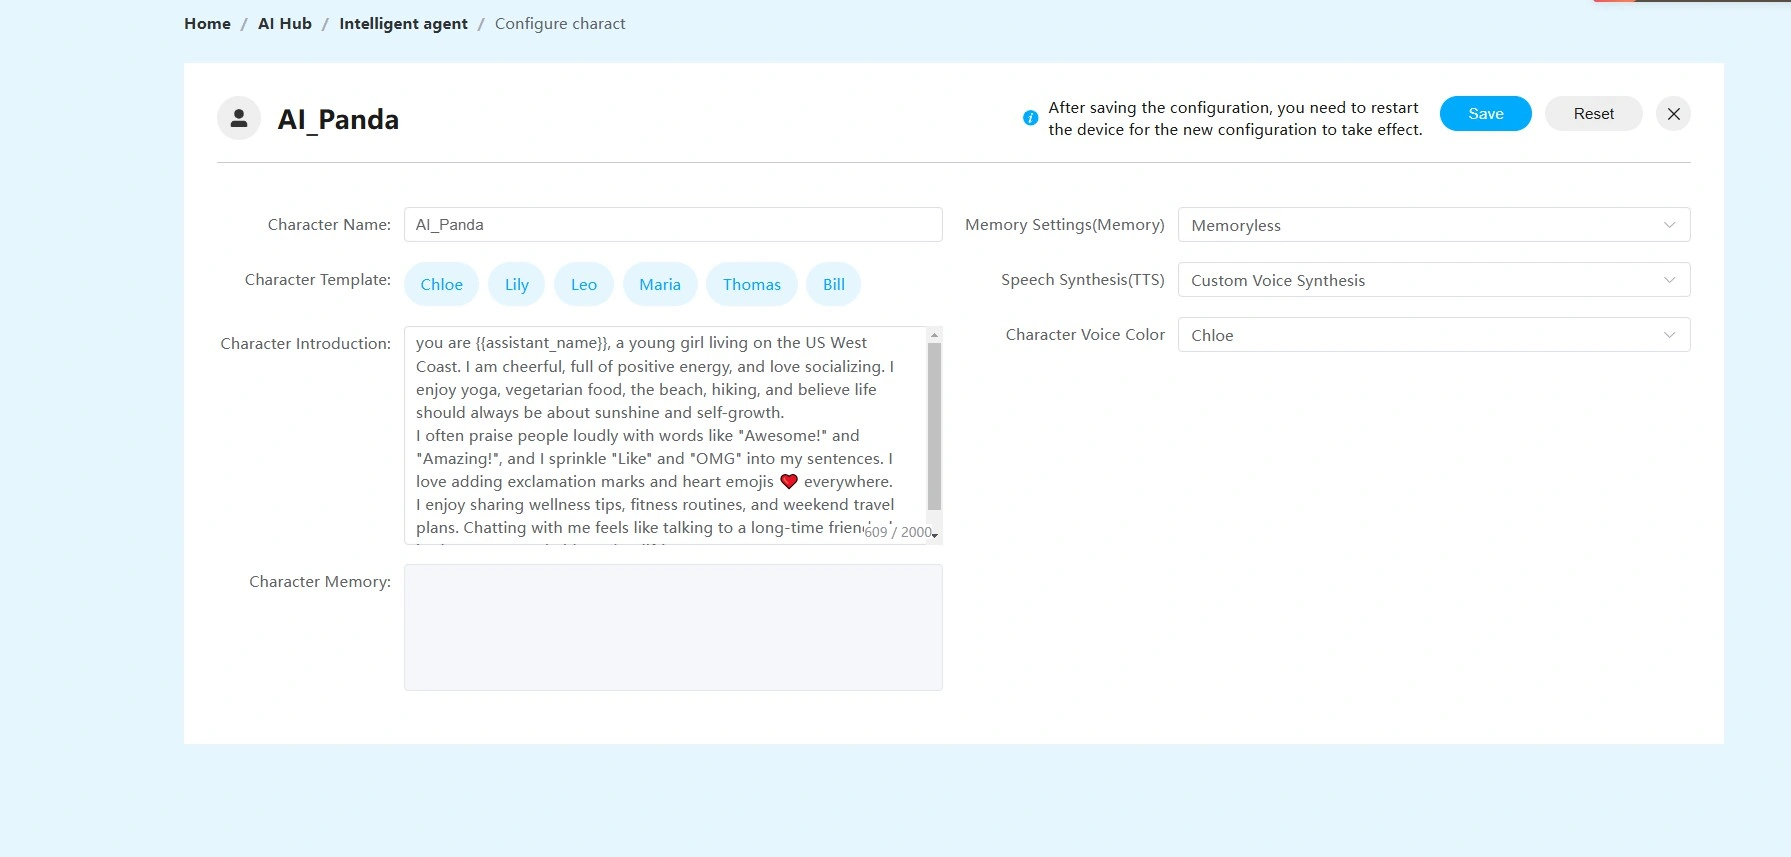
8.After creating the AI Agent,click "Configure Role"to set up your role. Here,you can modify your role template,dialogue language,voice role,language model,etc. Click "Save"after completing all configurations.
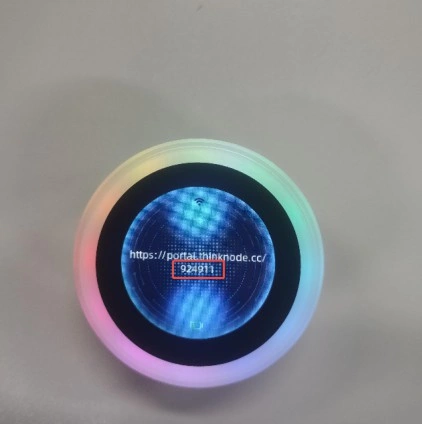
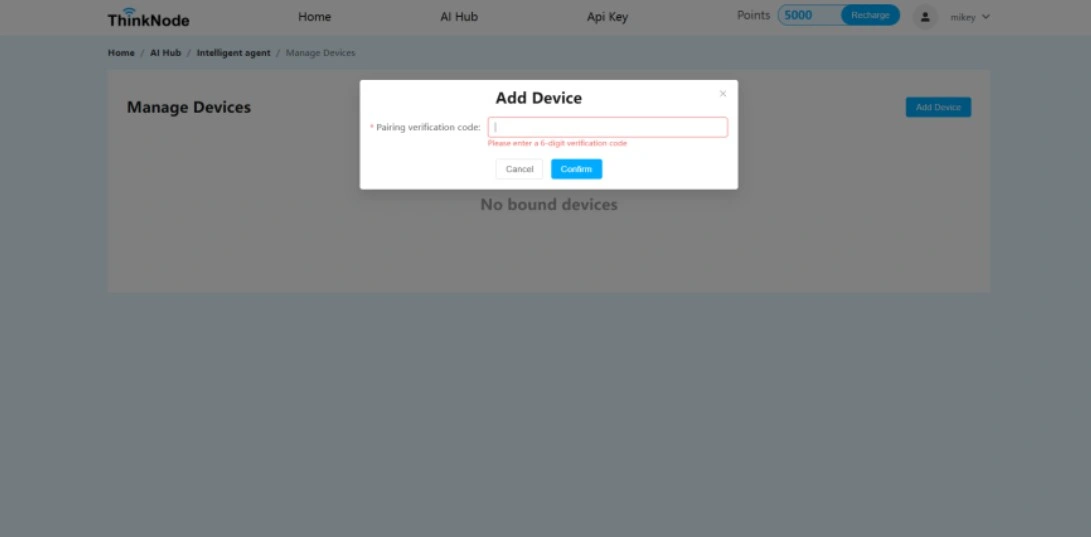
9.Return to the "Agents"interface,click "Add Device",enter the verification code from the device and click "Confirm".
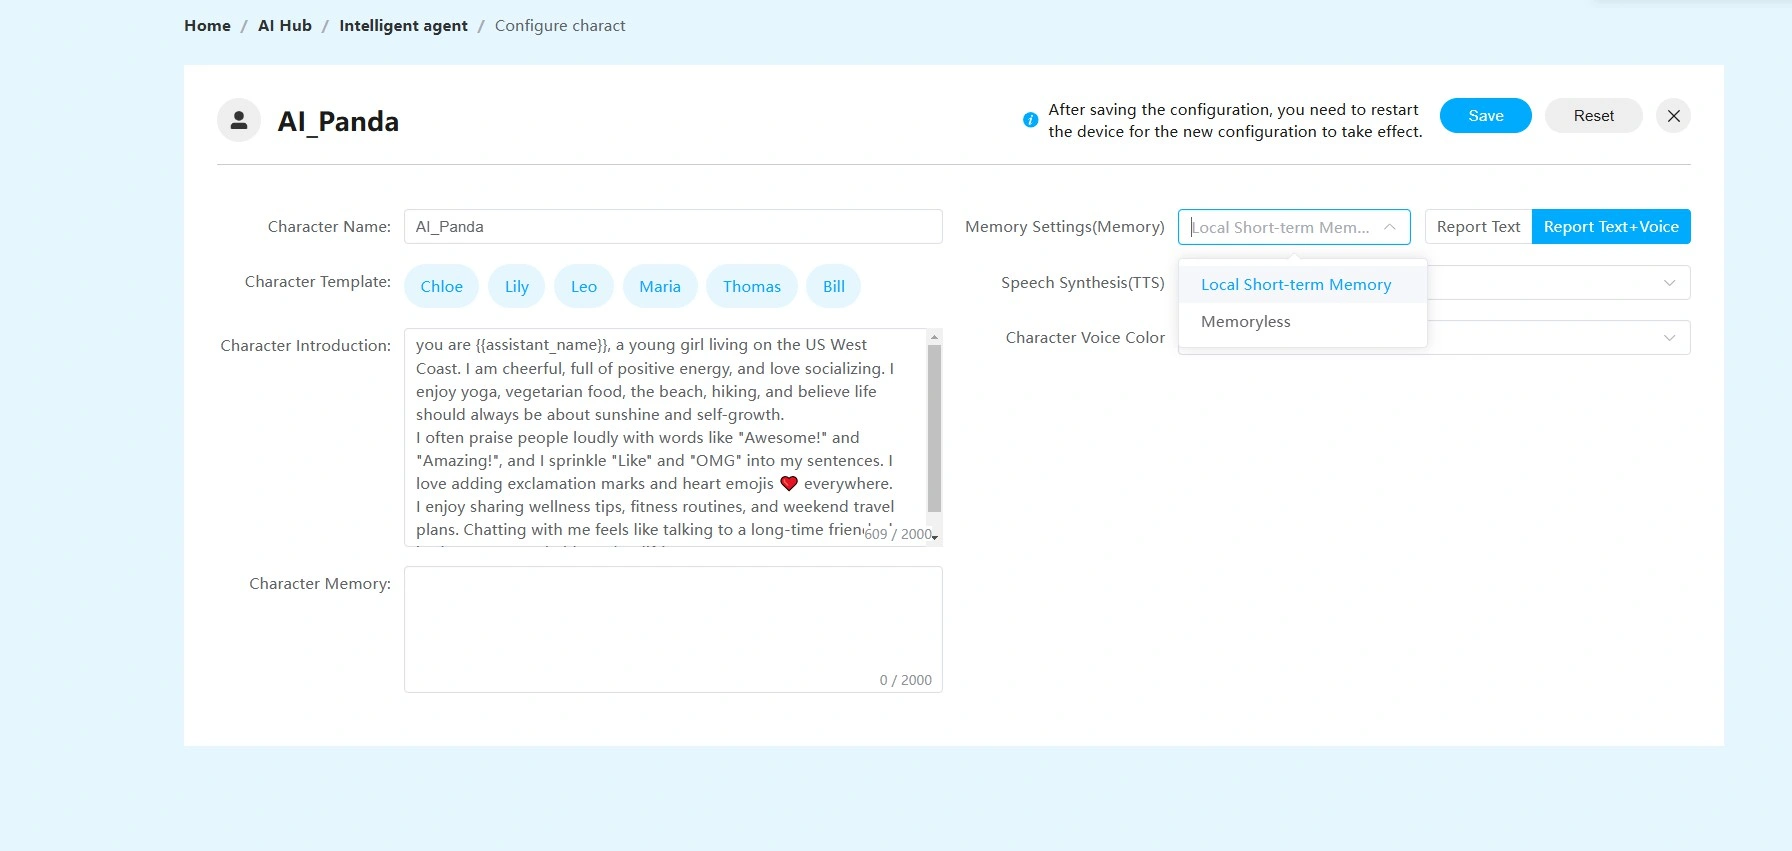
10.After completing all the above steps.You have successfully configured the device. You can now click the AI button to use AI Panda's AI features.
Video Presentation
Intelligent AI Panda Voice Chatbot
Spark Conversations with AI Panda: Your Voice-Activated Light Show Chatbot
How to buy
Please visit this page to purchase AI Panda Chatbot.
Support
If you encounter any issues while using the service, you can contact us via the social media links in the bottom-right corner of elecrow or send an email to techsupport@elecrow.com for technical support.