4 SD card stores images and displays them locally
Welcome to the application tutorial of Lesson 4. The effect to be achieved in this lesson is to store the images that need to be displayed on the SD card and display them on the CrowPanel ESP32 Advance HMI.
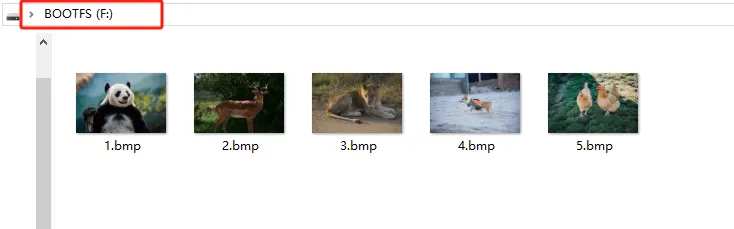
This lesson requires everyone to prepare an SD card to store pictures. And a card reader.
1 Select the photos you want to display on the browser and save them on the desktop (the save path can be customized)

2 Modify the resolution of the image based on the size of the product you are using.
This is the resolution size we accept for each size product.
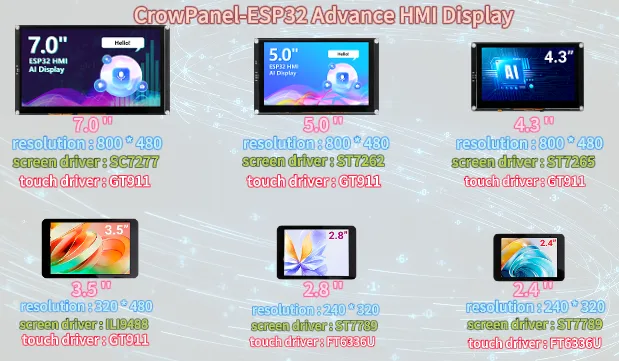
Here, for large-sized products, I will take the 2.4-inch product as an example to introduce how to modify the resolution of images.
The resolution of the 2.4-inch product is 320x240.
If you are using 7.0-inch, 5.0-inch and 4.3-inch products here, please change them to 800x480.
Refer to the resolution description for each size above
(Note: The image resolution of 7.0-inch, 5.0-inch, and 4.3-inch products is consistent, and the code and image can be used interchangeably.)
Click on the link below to download the materials used in this lesson.

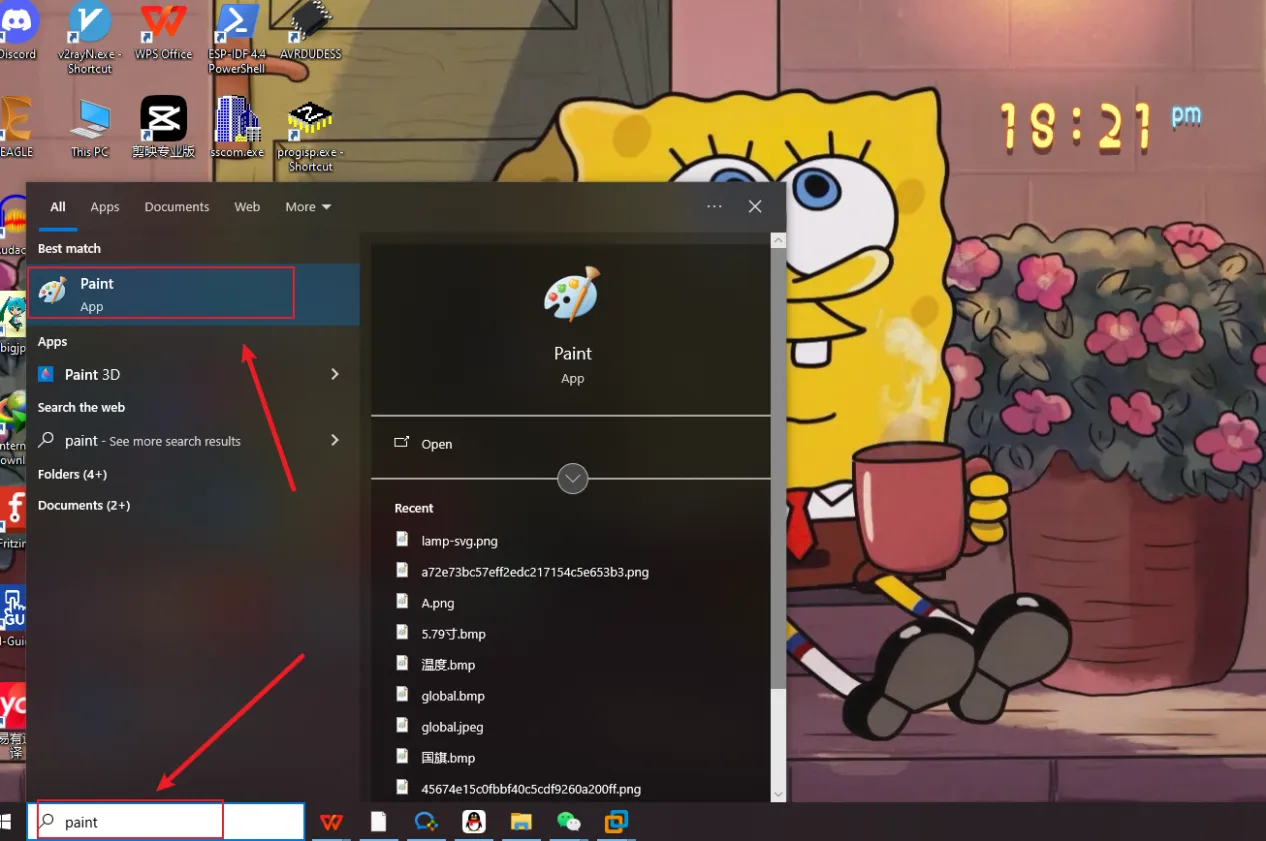
First, open the "paint" tool on the computer.
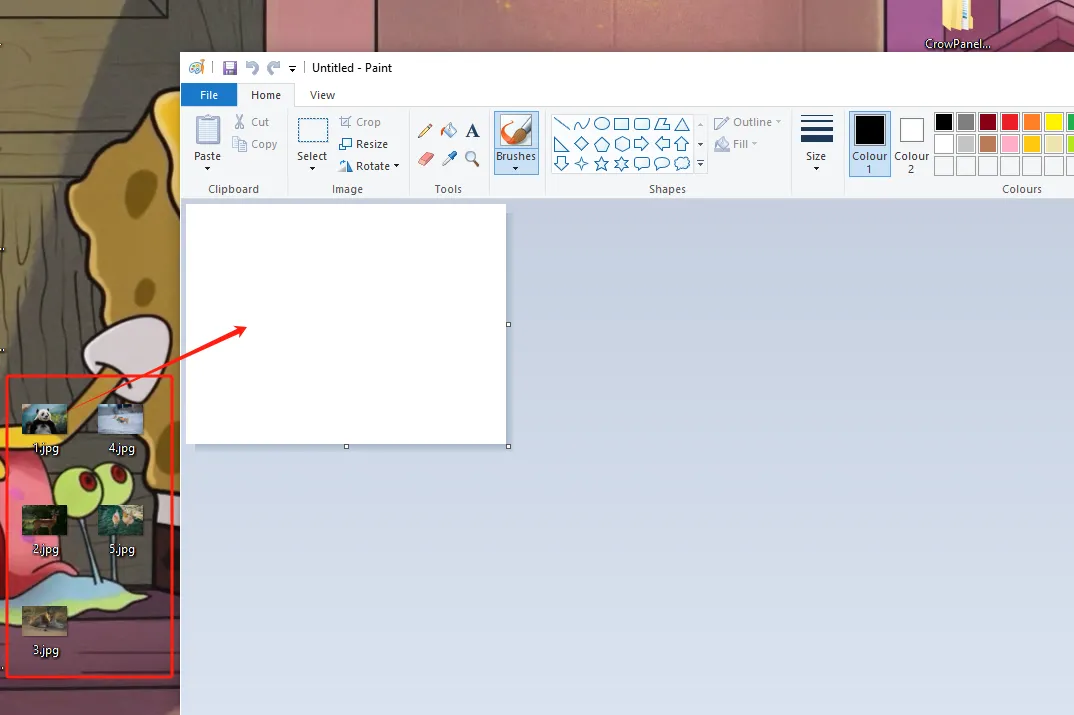
Drag and drop the image into the "paint" tool to readjust the pixels of the image
(Images can be uploaded to the browser and selected according to everyone's preferences)
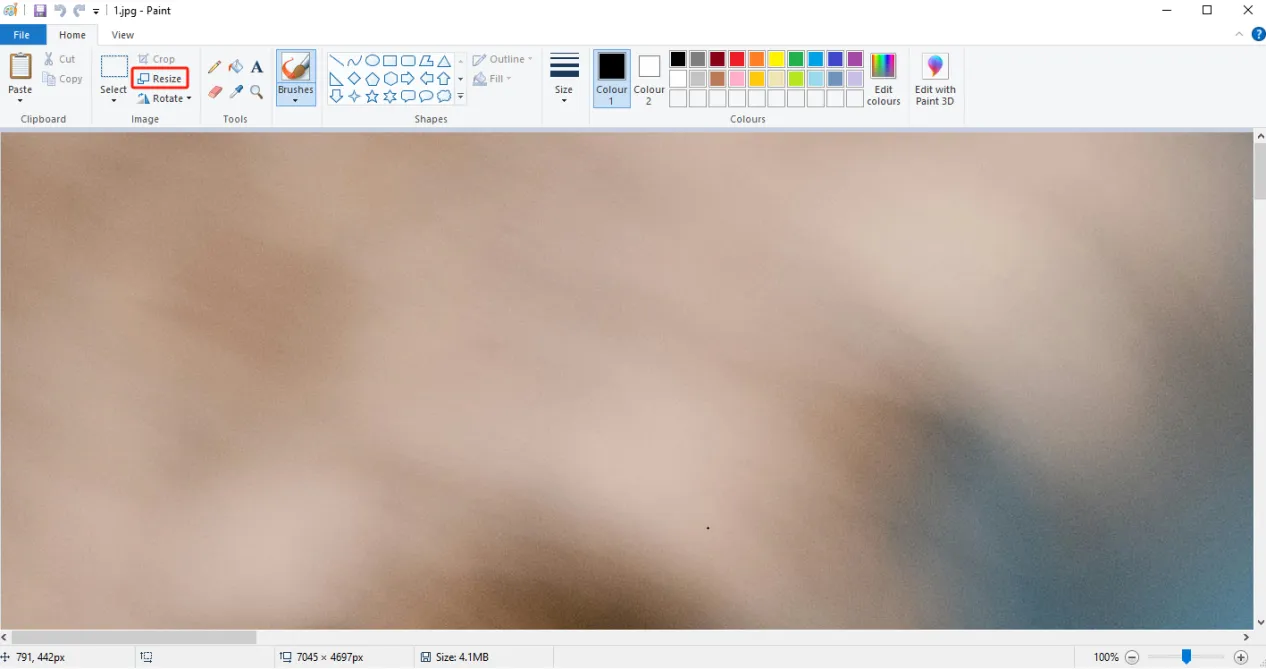
Adjust the pixel to 2.4-inch screen resolution: 320x240
(If you are using a different size, please set the correct resolution)
Can be referred to:There are resolutions of different sizes as references above. (Second point)

Click confirm
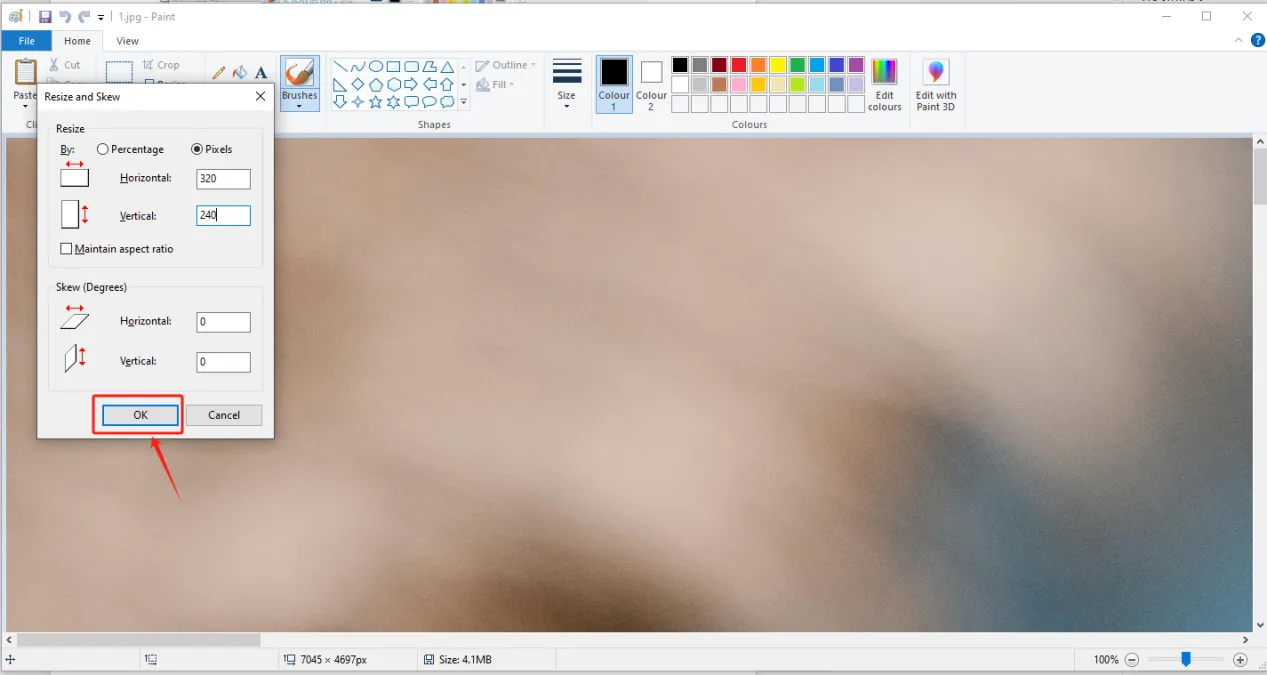
Adjust the resolution of the image as shown in the picture
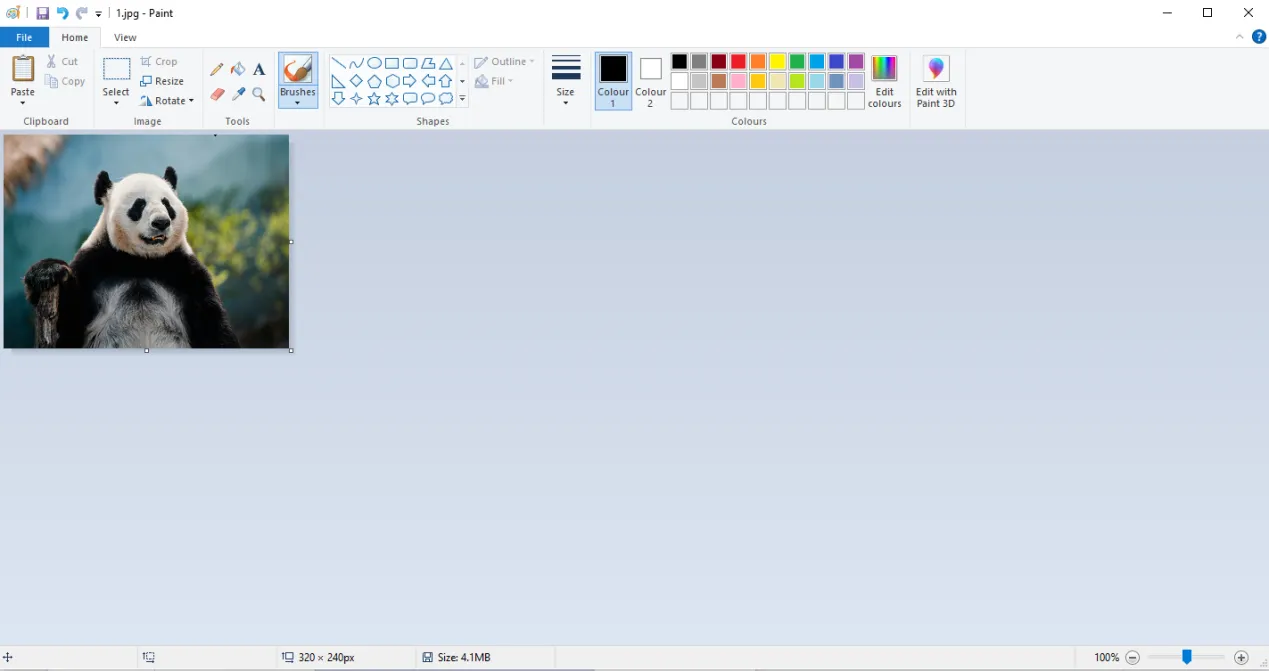
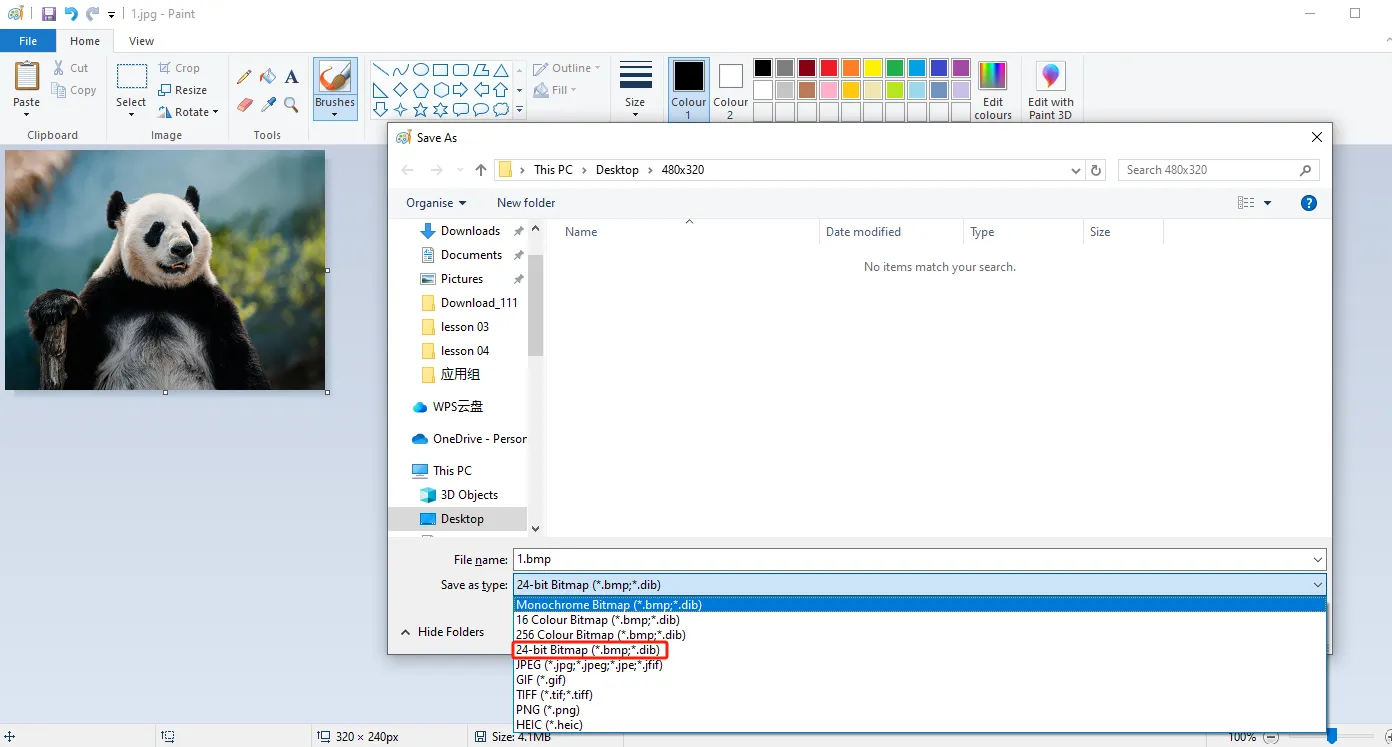
Save to a folder for easy use (folder path can be customized)
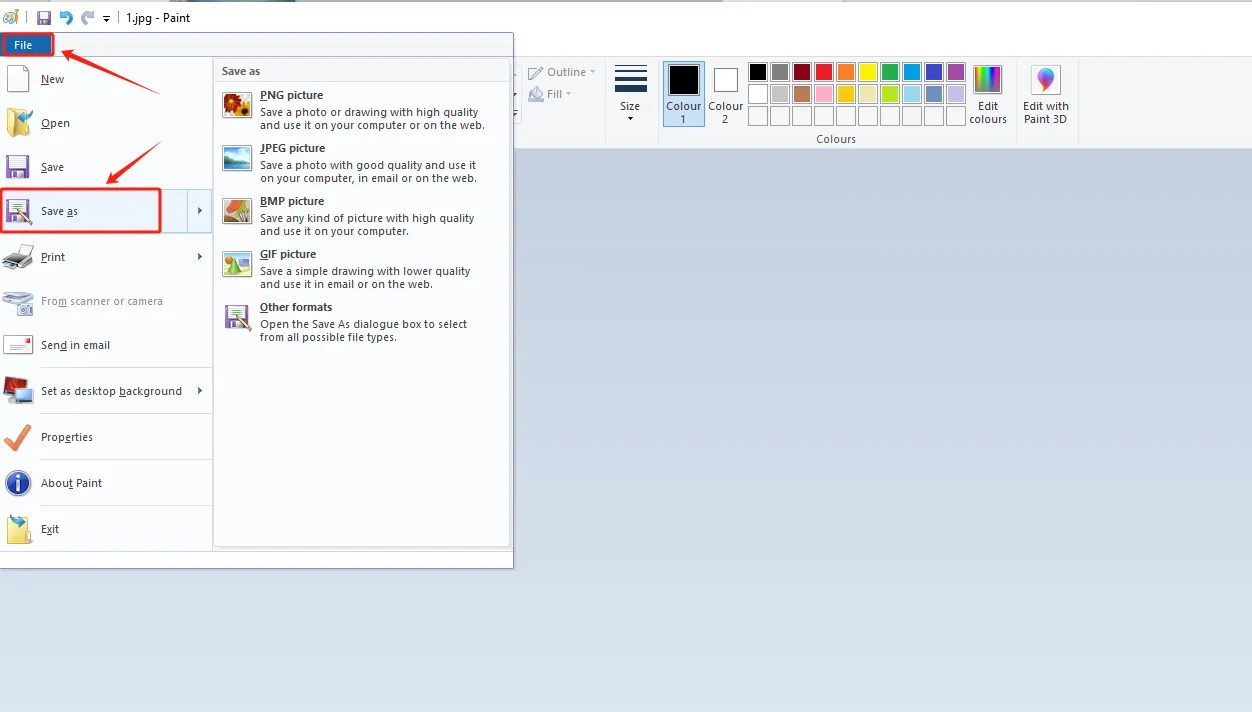
Save in BMP format (must have a 24 bit image depth)
Insert the SD card into the card reader

Open the SD drive, copy the modified image to the SD drive and save it
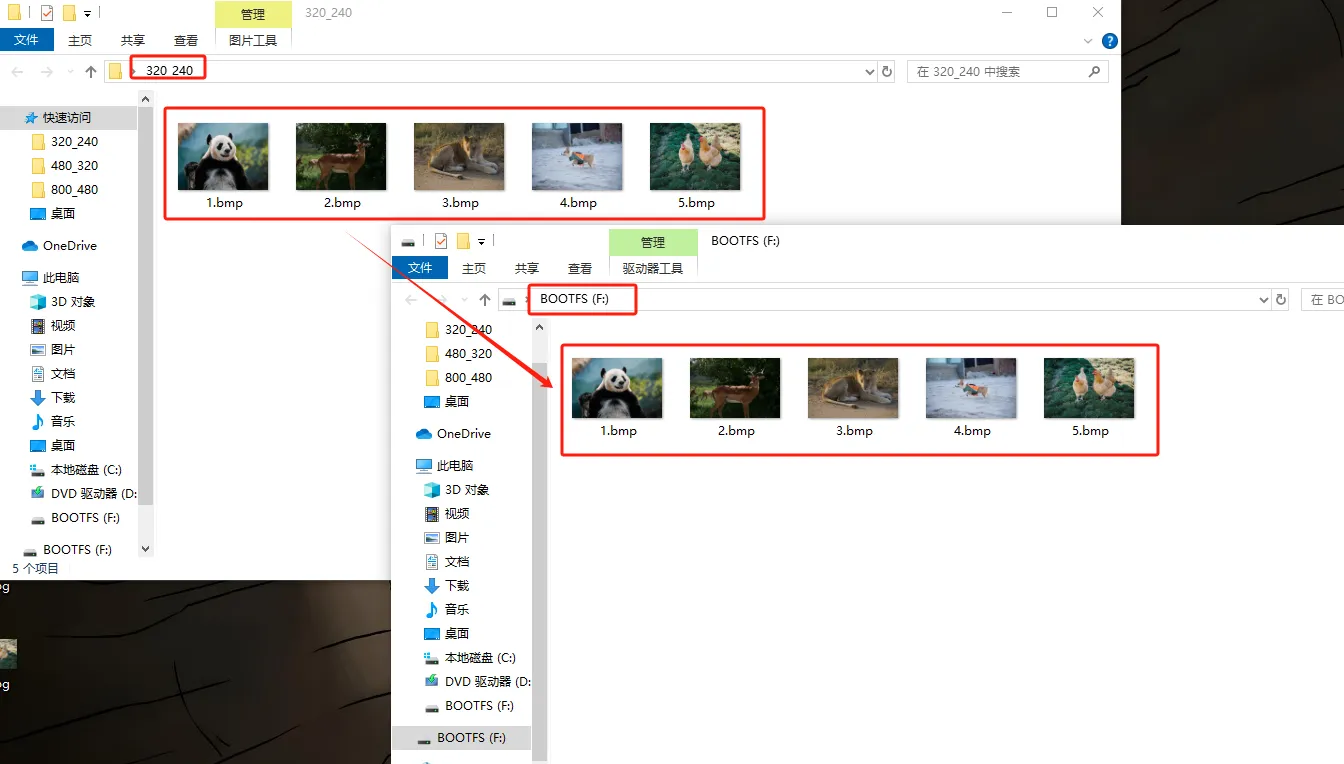
Exit the SD card and remove the SD card
3 Insert the SD card containing this saved image into your CrowPanel ESP32 Advance HMI
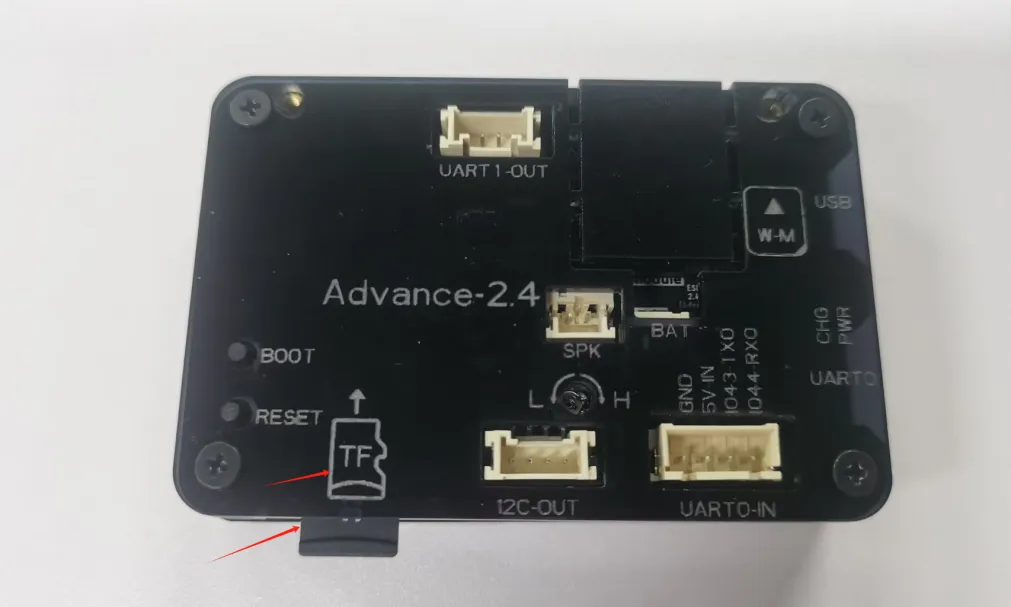
(2.4 inch, 2.8 inch, 3.5 inch products can be directly inserted for use)
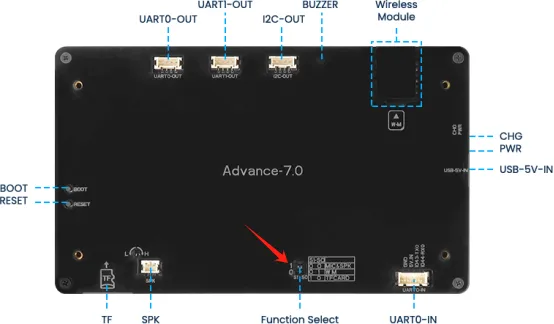
(After inserting the SD card, turn the function switch to 1 1 mode (TF Card mode) for 4.3-inch, 5.0-inch and 7.0-inch.)
4 Open the code we provide, and you only need to modify the path and name of the image you saved
Click the link below to download the code for this lesson.

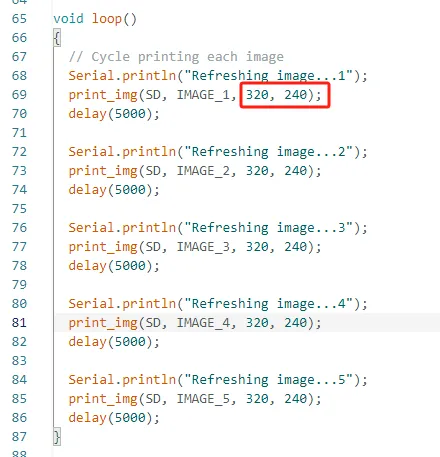
Modify the path of the image you saved
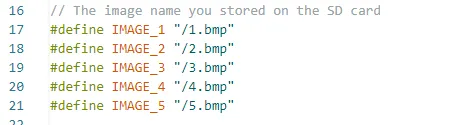
Here, my path is the five images in the current path on the SD card
So the path of my image is the current path "/" plus the image name (1. bmp)
Then display the image in the loop and set the resolution size
(different sizes have different resolutions)
If you are using a product with a 7.0-inch, 5.0-inch or 4.3-inch screen, you need to modify the screen resolution parameter here to 800 × 480.
The function SD_init() is responsible for completing the initialization work of the entire SD card file system. The function first configures the SPI bus pins (SCK, MISO, MOSI and CS), and then attempts to mount the SD card file system using the HSPI bus through SD.begin().
When the mounting is successful, it reads and prints the capacity information of the SD card, such as the total capacity size, and calls the listDir() function to scan the files and folders under the root directory of the SD card to confirm whether the image files have been correctly stored on the card. If the mounting fails, it will output an error message and return an error code.
The entire function is equivalent to the preparation stage before using the SD card, and only after successful initialization can the program read BMP image files and display them on the screen normally.

The function listDir() is designed to traverse all files and subdirectories within a specified directory and print the results to the serial monitor. The function first opens the specified directory, then checks whether the path exists and whether it is of directory type. If the directory is opened successfully, it uses the function openNextFile() to read the files in the directory one by one.
When encountering a regular file, the file name and file size are output; when encountering a folder, the folder name is output, and whether to recursively enter the next layer of the directory for further scanning is determined according to the levels parameter.
Through this recursive traversal method, the file structure on the SD card can be quickly viewed, and whether the image files exist and the storage path are correct can be confirmed. Therefore, this function essentially functions as a simple version of a file manager or directory browser.

The function displayImage() reads BMP format images from the SD card and displays the image content on the LCD screen. The function first opens the specified BMP file, then skips the fixed 54-byte file header of the BMP file and directly locates to the pixel data area. Since BMP images are stored in the RGB888 format, each pixel occupies 3 bytes, so the program creates a buffer that can store the pixel data of a whole row.
Then, through a loop, it reads the image content row by row, reads one row of RGB data from the SD card each time, and calls LovyanGFX's gfx.pushImage() to draw this row of pixels at the corresponding position on the screen. This process is repeated continuously until all rows are displayed, ultimately forming a complete image.
This function adopts the "read row by row, display row by row" approach instead of loading the entire image into memory at once. Therefore, it can display high-resolution BMP images with a resolution higher than that of the ESP32's limited RAM. It is a typical streaming image display scheme.

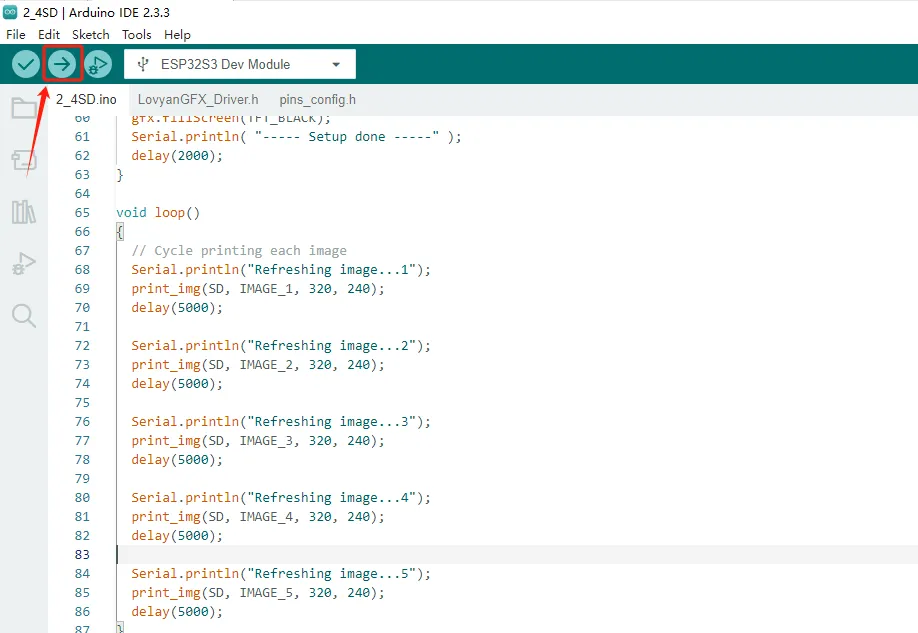
5 Configure the runtime environment and burn code
(Before burning, please replace the relevant library files according to different sizes.
How to replace, details in Lesson 1)

6 Phenomenon display
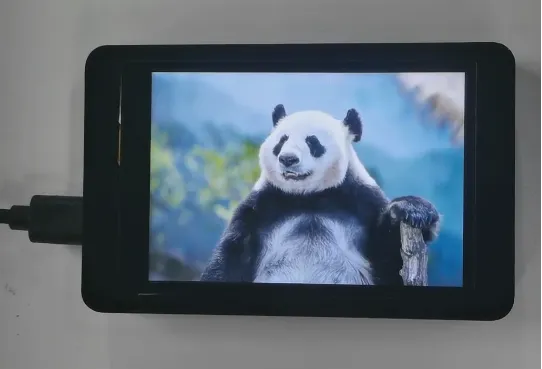
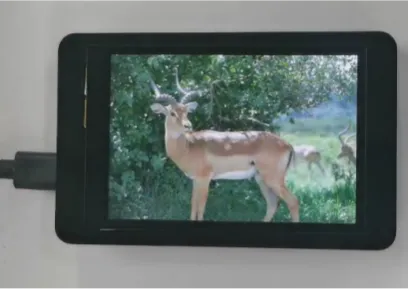
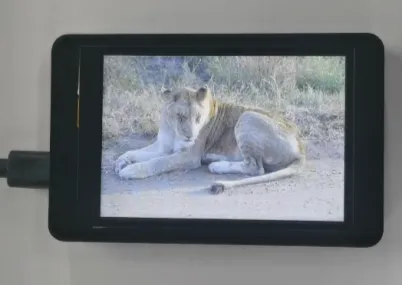
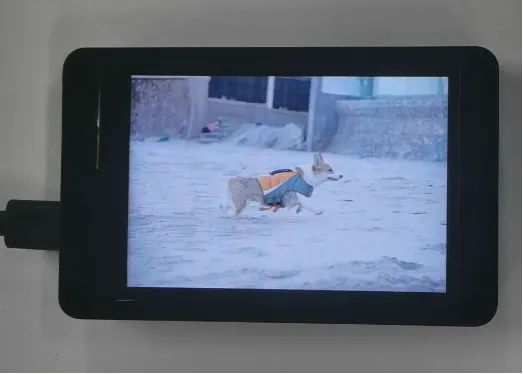
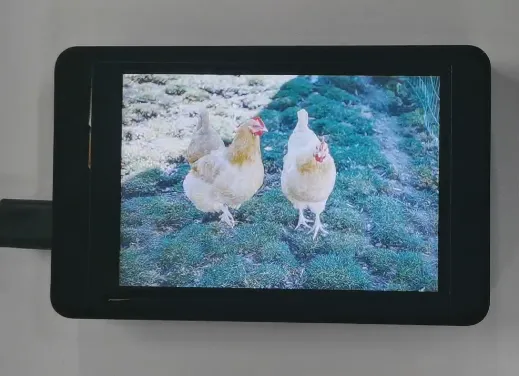
The five photos I saved on the SD card will be displayed in a loop.
Kind Reminder:
You are currently viewing the 7-inch product of CrowPanel Advance HMI, and the version here is V1.3 / V1.4 / 1.5. (The following content is also applicable to the 5.0-inch V1.2 / v1.3 and 4.3-inch V1.1 / V1.2 / V1.3 versions.)
In terms of hardware, we use a microcontroller (STC8H1K28) to control the screen backlight, speaker on/off, and buzzer.

(However, there are other function interfaces that need to be written in the specific code, and you can refer to the complete code provided later.)
Explanation:
- 0x30 is the I2C address of the microcontroller (STC8H1K28).
- 0x5D is the I2C address of the touch IC (GT911).
- sendI2CCommand(0) means sending command 0 to the microcontroller (address 0x30) to instruct it to set the screen brightness to maximum.
For 0 mentioned above, you can replace it with the following values:
- 0 is the brightest backlight.
- 0 to 245: The screen brightness will gradually increase to the minimum value
- 245 represents turning off the screen light
Additional notes:
You can also control the following functions by sending other instructions to the microcontroller:
- It means sending the 248 command to the microcontroller (0x30) to instruct the speaker to turn on.

- It means sending the 249 command to the microcontroller (0x30) to instruct the speaker to turn off.

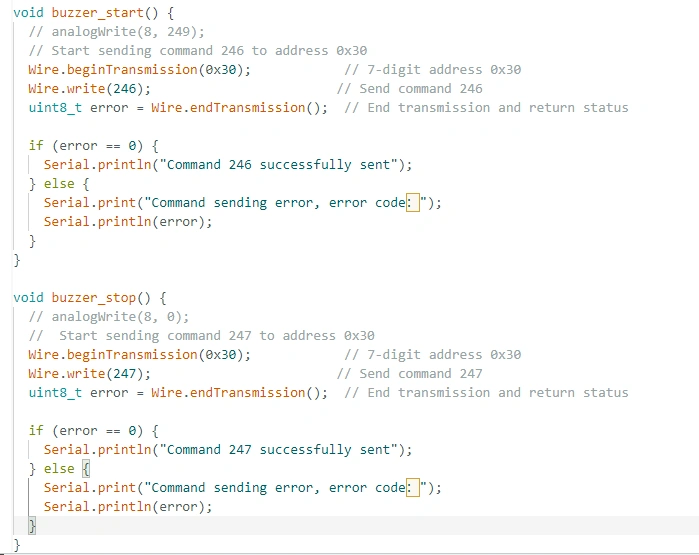
- You can also send command 246 to control the buzzer to turn on, and send command 247 to control the buzzer to turn off.
7 Code reference
7.0 inch、5.0inch、4.3inch
Click on the link below to download the code for this lesson:
If your code compiles incorrectly, you can check if the ESP32 version number is correct. The ESP32 version number we need for this lesson is 3.0.2.

Secondly, please pay attention to replacing the corresponding size library file.
Select the appropriate library file based on the product screen size
Click the link below to download the corresponding library file.
Library file link:
If you are not sure where to place the library files and how to configure them properly so that the code can correctly recognize these library files, please refer to the operation steps in the first lesson.