Lesson11 Develop for ESP-matter on CrowPanel Advance HMI ESP32-S3 AI-Powered IPS Touch Screen
1.Hardware Composition:
One set of ESP32H2 module or ESP32C6 module (The H2 module uses Thread network, and the C6 module uses Wi-Fi network)
2.Environment Composition:
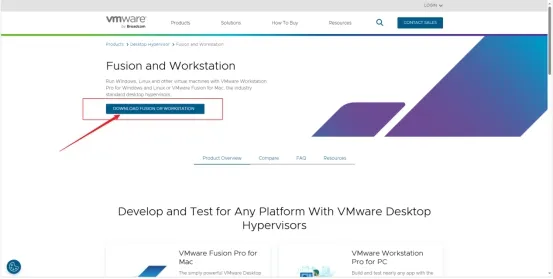
Step 1: First, install the VMware virtual machine. It is recommended to download it from the official website. Here is the official website link.
https://www.vmware.com/products/desktop-hypervisor/workstation-and-fusion
Note that you need to fill in the activation key in the last step of the installation. If you don't fill it in, you can only use it for a 30-day trial period.
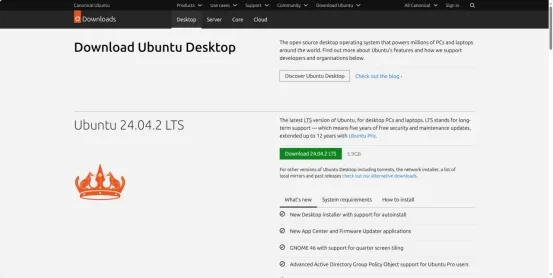
Step 2: Download the Ubuntu image. It is not recommended to save it in the C drive. It is best to download version 20.04 or 22.04. The link is as follows:
https://ubuntu.com/download/desktop
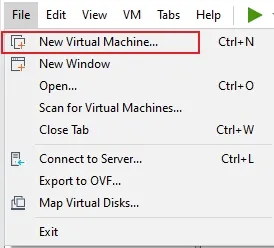
Step3:Open the VMware that has just been installed, click "Create a New Virtual Machine", and start configuring the virtual machine environment.
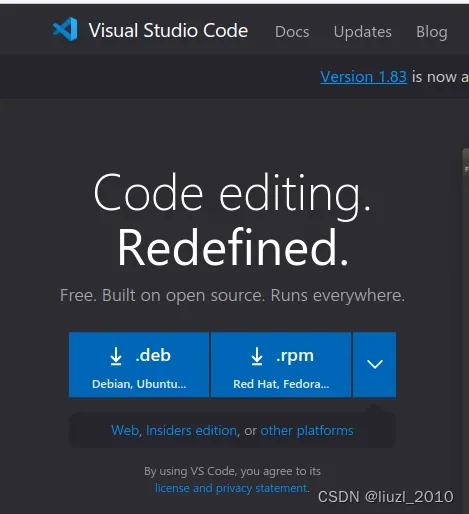
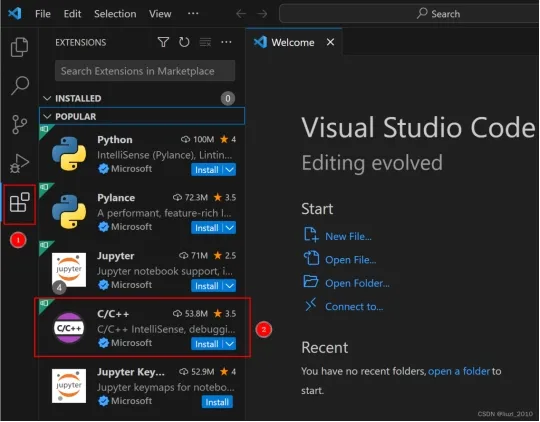
Step4:Download and install VS Code
Go to official website to download:https://code.visualstudio.com/
Run VSCode and install the base extension
①:Click on the [Extensions] extension icon.
②:Select the C/C++ extension plugin and click [Install].
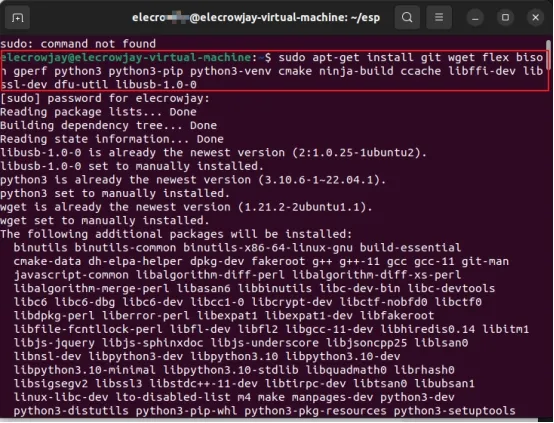
Step5:Install the Python 3 environment.
Enter the command line at the terminal
sudo apt-get install git wget flex bison gperf python3 python3-pip python3-venv cmake ninja-build ccache libffi-dev libssl-dev dfu-util libusb-1.0-0
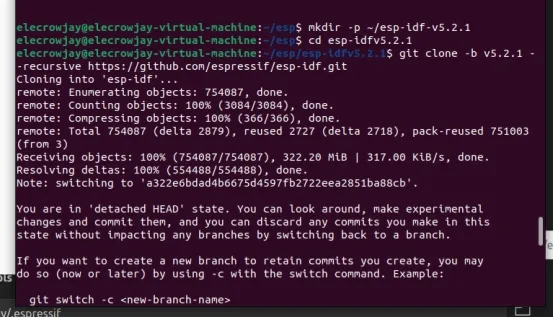
Step6:Pull the version idfv5.2.1.
Create a new folder.
Enter the command line in the terminal and clone the IDF of version v5.2.1 into this folder.
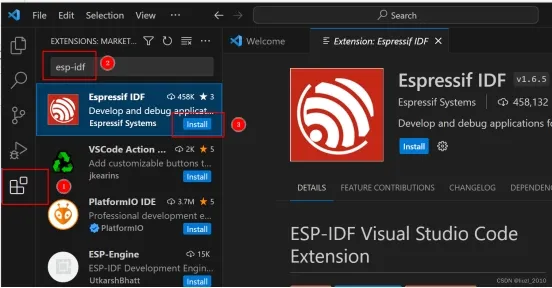
Step7:Install the IDF plugin in Visual Studio Code (VSCode).
①: Click on the [Extensions] extension icon.
②: Search for keywords such as "espressif", "esp-idf", "esp32", "esp32s2" in the Extensions section.
③: Click [Install] for the esp-idf extension.
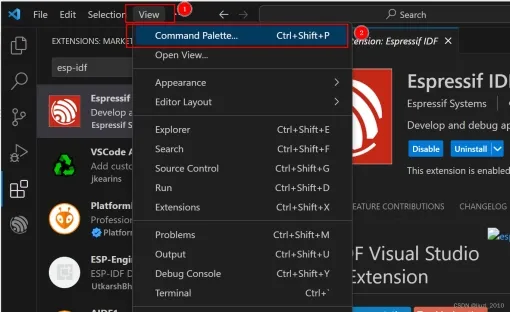
Open the Command Palette ① click [View], ② Select [Command Palette]
Alternatively, press F1 to open the command panel. On the command panel, enter [ESP-IDF: Select where to save configuration settings], user Settings, workspace Settings, or workspace folder Settings. For more information see Working with multiple projects, the default is user setting.

Wait for the following progress bar to complete

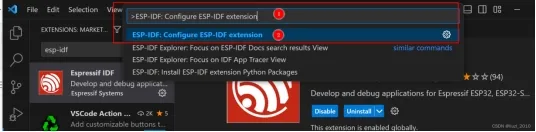
Then enter: [ESP-IDF: Configure ESP-IDF extension] in the command panel, and click "ESP-IDF: Configure ESP-IDF extension".
Once inside, select[ADVANCED]
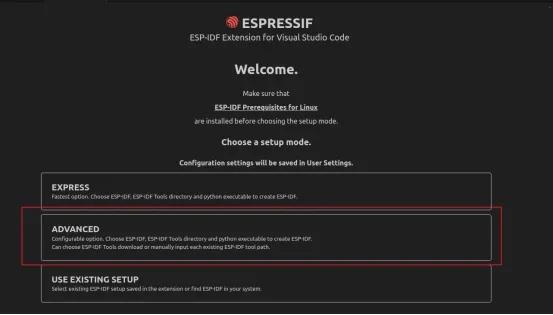
The following interface
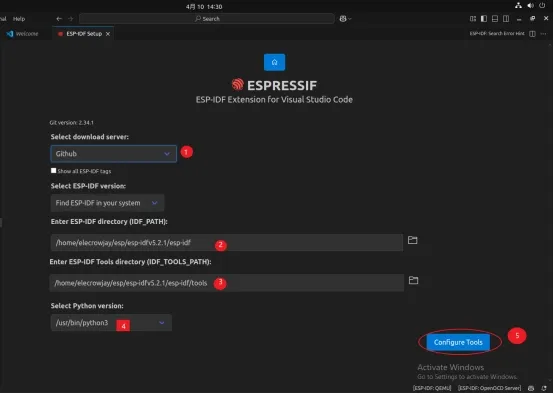
① Select github
② Select the address you just cloned
③ Select the tools folder in the cloned file
④ Select the python tool path: select system python3
⑤ Then click [Configure Tools] to start installation
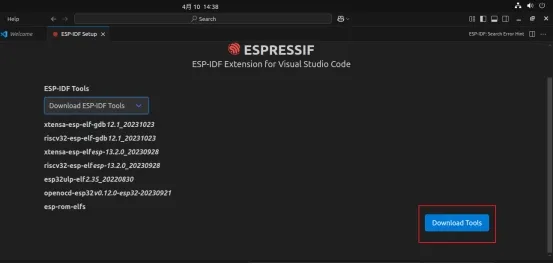
Click [Download Tools]
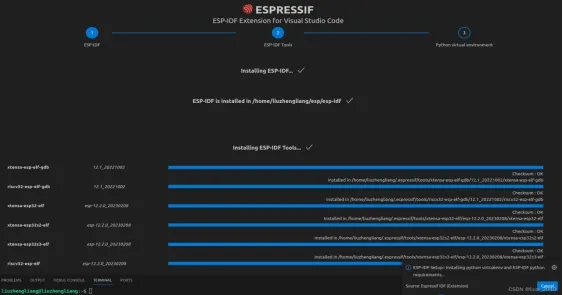
Then, wait for the installation to complete
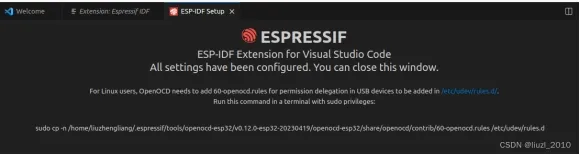
Seeing this interface, congratulations, the correct installation is complete
3.Steps to install esp-matter
Step 1: Install the essential components for esp-matter
Open the terminal and execute the following commands:
sudo apt-get install git gcc g++ pkg-config libssl-dev libdbus-1-dev \
   libglib2.0-dev libavahi-client-dev ninja-build python3-venv python3-dev \
   python3-pip unzip libgirepository1.0-dev libcairo2-dev libreadline-dev
Step2:Clone the esp-matter repository
To clone the esp-matter repository with all its submodules, use the following command:
cd esp-idf
source ./export.sh
cd ..
git clone --recursive https://github.com/espressif/esp-matter.git
cd esp-matter
./install.sh
cd ..
4.Change the development board configuration
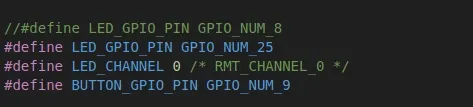
Step 1: Modify the content according to the esp-matter/device_hal/device/esp32c6_devkit_c/device in the file. Since the board you are using employs GPIO to drive the LED lights, while the original example code uses WS2812 for driving by default, make the following modifications: (Modify LED_GPIO_PIN in device.c according to the LED control IO port.) (Modify SET(led_type xxxx) in esp_matter_device.cmake according to the LED drive type.)
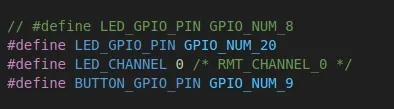
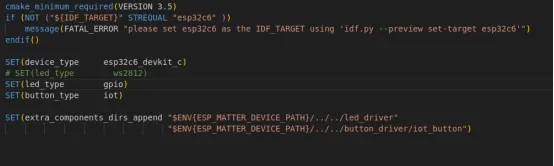
The same applies to the ESP32H2. Similarly, modify the IO and LED type.

Step2:Connect the development board to the computer.

Step3:Configure the development board
Open the VSCode terminal and configure the environment. (Note: You need to configure the environment every time you open the terminal.)

Set up accelerated compilation

Open the ESP-Matter SDK related example "light" in VSCode and the terminal.(esp-matter/examples/light)
Set the model of the development board.
The chip settings are successful.

Use idf.py menuconfig to enter the component config/ESP system settings, and modify the Channel for console output as shown in the figure:

5. Compile and flash the code.
ESP32C6:
Note:use WiFi
1、Connect COM
2、compiled code
3、Flash the chip.
(note: ttyAcm0 is the automatically identified output COM port number)
4、Open the serial monitor. Use the command
to connect the device to the network. After the device is connected to the network, enter the
command in the terminal to start debugging with the chip-tool.


5、IP pairing
Method 1: The following command will discover devices and attempt to pair with the first device it finds using the provided setup code:
Method 2: The following command will discover devices with a long discriminator of 3840 and attempt to pair with the first device it finds using the provided setup code.
Choose either way to specify the device node_id (in hexadecimal format starting with 0x) for pairing. After the pairing is successful, the serial monitor will output the corresponding device information.
6、Debugging control
Turn on the light:
Turn off the light:
ESP32H2:
Note:Use the Thread border router
Compile the code. Enter the chip-tool debugging mode in the terminal by using the command
Then, perform IP pairing by using the command .


<node_id> Is the user definition of the node being delegated ID.
<operational_dataset> It is the border router in the Thread network Operational Dataset.
<pin_code> and <descriminator> Is a device-specific key
Debugging control
Turn on the light:

Turn off the ligh:

Precautions: When using the pairing ble-xxxx command, you need to connect the virtual machine to Bluetooth.