Lesson2 Introduce the screen user interface and external speakers for playing songs
Welcome to the second lesson of learning. I believe that after completing the first lesson, everyone has gained a deeper understanding of our product. Next, I will lead you to the first application case of the Advance series products - connecting to WiFi to play songs.
1 Product Interface Introduction
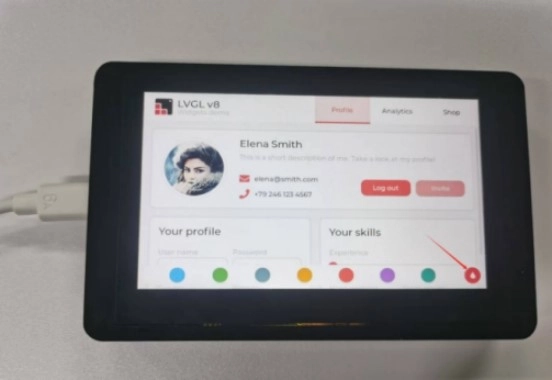
When you power on the product, you will see the following interface.
The following interface was generated by introducing the official firmware of LVGL, and the specific operation will not be explained in this lesson for now. In the next class, we will mainly explain the LVGL graphics library. You can follow our updates to facilitate your learning.
(The interface has not yet developed any functions and can only be viewed by sliding the interface.)


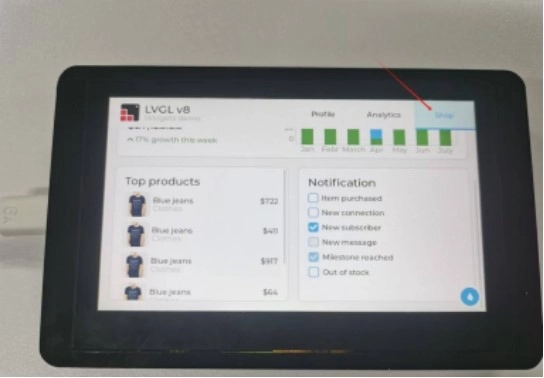
However, you can choose the theme color you want to use.
Note:Plug a speaker into the "SPK" interface,Connect the development board to the computer with a Type-C cable.
For the development versions with screen sizes of 4.3-inch, 5.0-inch, and 7.0-inch, the function select keys should be set to 00.

Then connect the speaker to the CrowPanel-Advance-HMI.

2 Compile and flash the code
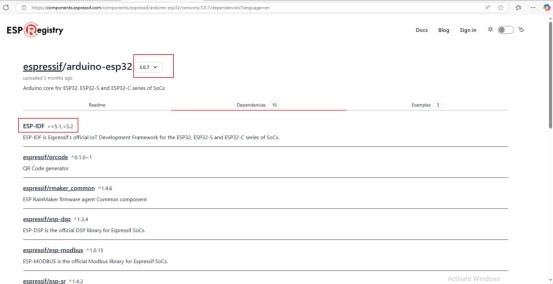
Note: The IDF version is 5.1.1, and the version of the Arduino component is 3.0.7.
**Step1:**Click the link below and you can access the code for this lesson.
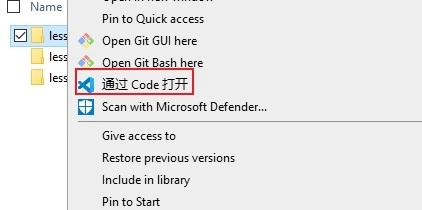
Select the code folder for this lesson, right-click on it, and then choose to open it with VS Code.
Note: Remember to replace the Wi-Fi name and Wi-Fi password you are using at the beginning of the main.cpp file.
Step2: Select a serial port to connect to the development board.

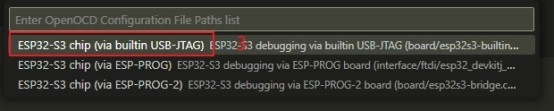
Step3: Select the chip model "esp32s3".
Note:Since there is an sdkconfig.defaults file in the project, the project can automatically recognize the development board configuration from this file, eliminating the need for manual configuration of the development board.

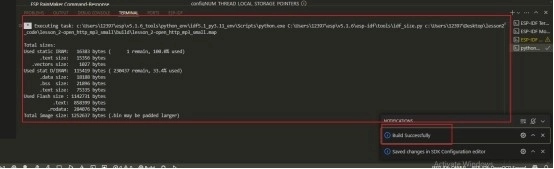
Step4: Click”build”.

Wait for the compilation to be completed.
Step5: Click”Upload”.

Wait for the flashing to be completed, and you can hear the speaker playing music.

Kind Reminder:
You are currently viewing the 7-inch product of CrowPanel Advance HMI, and the version here is V1.3.
(For the 4.3-inch V1.1 version and the 5.0-inch V1.2 version, the following information also applies.)
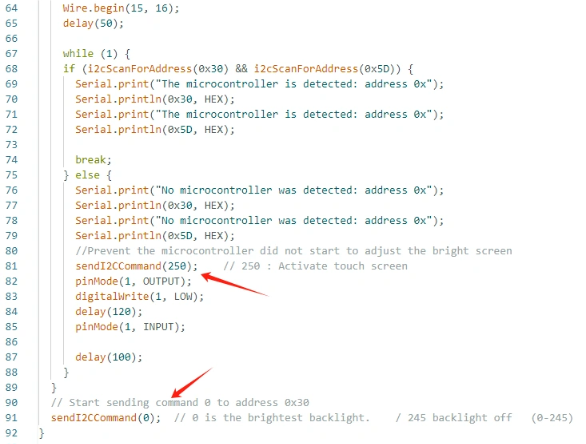
In terms of hardware, we use a microcontroller (STC8H1K28) to control the screen backlight, speaker on/off, and buzzer.
(However, there are other function interfaces that need to be written in the specific code, and you can refer to the complete code provided later.)
Explanation:
-
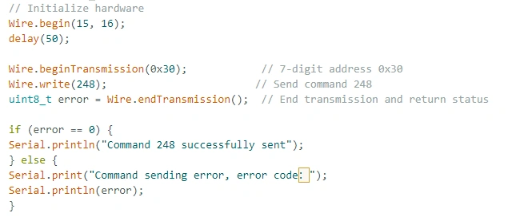
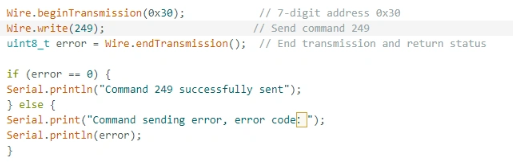
0x30 is the I2C address of the microcontroller (STC8H1K28).
-
0x5D is the I2C address of the touch IC (GT911).
-
sendI2CCommand(0) means sending command 0 to the microcontroller (address 0x30) to instruct it to set the screen brightness to maximum.
For 0 mentioned above, you can replace it with the following values:
- 0 is the brightest backlight.
- 0 to 245: The screen brightness will gradually increase to the minimum value
- 245 represents turning off the screen light
Additional notes:
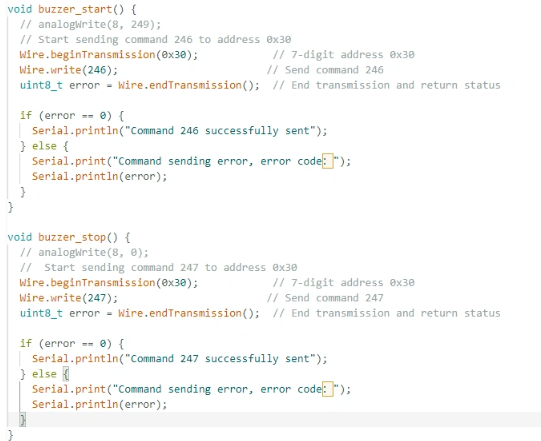
You can also control the following functions by sending other instructions to the microcontroller:
- It means sending the 248 command to the microcontroller (0x30) to instruct the speaker to turn on.
- It means sending the 249 command to the microcontroller (0x30) to instruct the speaker to turn off.
- You can also send command 246 to control the buzzer to turn on, and send command 247 to control the buzzer to turn off.